

Wordpress tutorial
Tijdsduur: +/- 10 minuten
In deze tutorial leer je hoe je je Donatieknop aan de footer van je Wordpress website kunt toevoegen.
Met de Donatieknop kun je direct vanaf jouw website donaties in ontvangst nemen! De knop staat met een paar simpele stappen op je Wordpress website. We leggen de volgende stappen aan je uit:
Met de Donatieknop kun je direct vanaf jouw website donaties in ontvangst nemen! De knop staat met een paar simpele stappen op je Wordpress website. We leggen de volgende stappen aan je uit:
- 1. Creëer je Donatieknop
- 2. Voeg javascript toe aan je website
- 3. Voeg de knop toe aan je website
Let op: je hebt een kunstenaarsaccount nodig om deze tutorial te kunnen voltooien.
Voorbeeld
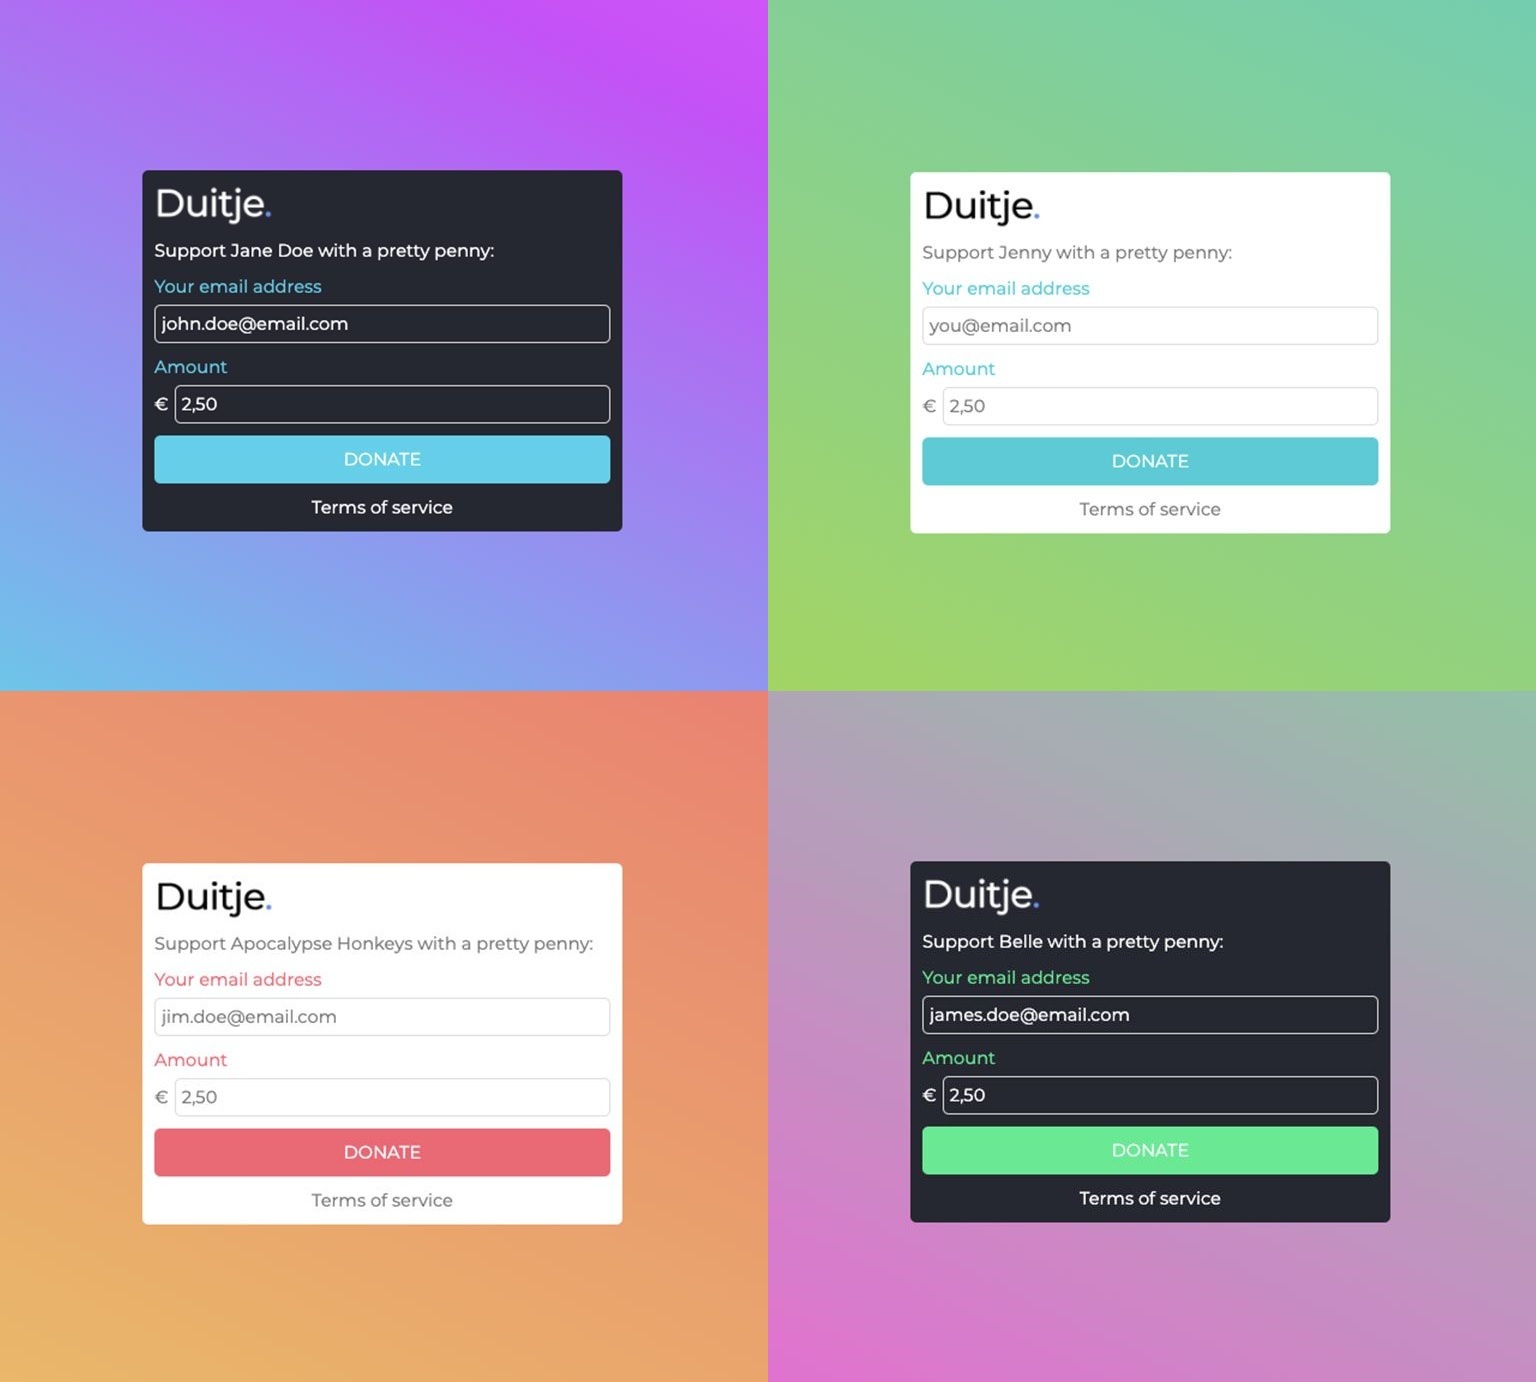
De knop is in een licht en een donker thema in te stellen en je kunt onder andere de kleuren instellen.
1. Creëer je Donatieknop
Het aanmaken van je persoonlijke Donatieknop is heel simpel. Log in en ga naar deze pagina. Voer hier de volgende 3 taken uit:
- - Vraag een API-sleutel aan door op "Vraag een API-sleutel en geheime code aan" te klikken.
- - Vul het domein in waarop je de button wilt gebruiken door op "Domein toevoegen" te klikken. Dit is bijvoorbeeld mijn-wordpress.nl.
- - Gebruik de wizard om je Donatieknop in te stellen en vorm te geven.
Als je deze stappen hebt voltooid krijg je als resultaat twee codes, die je in je Wordpress site moet invoegen. De codes zien er als volgt uit:
Code 1:
<script src="https://duitje.online/api.min.js"></script>
Code 2:
<div class="duitje-dbtn" data-sitekey="YOUR_API_KEY"></div>
Sla jouw persoonlijke codes even ergens op, want je hebt ze in de volgende stappen nodig.
2. Voeg javascript toe aan je website
In deze stap voeg je Code 1 toe aan de head-tag van je website.
Om Code 1 te plaatsen, heb je een plugin nodig waarmee je codes kunt toevoegen aan de head-tag van je website. Hieronder beschrijven we twee manieren:
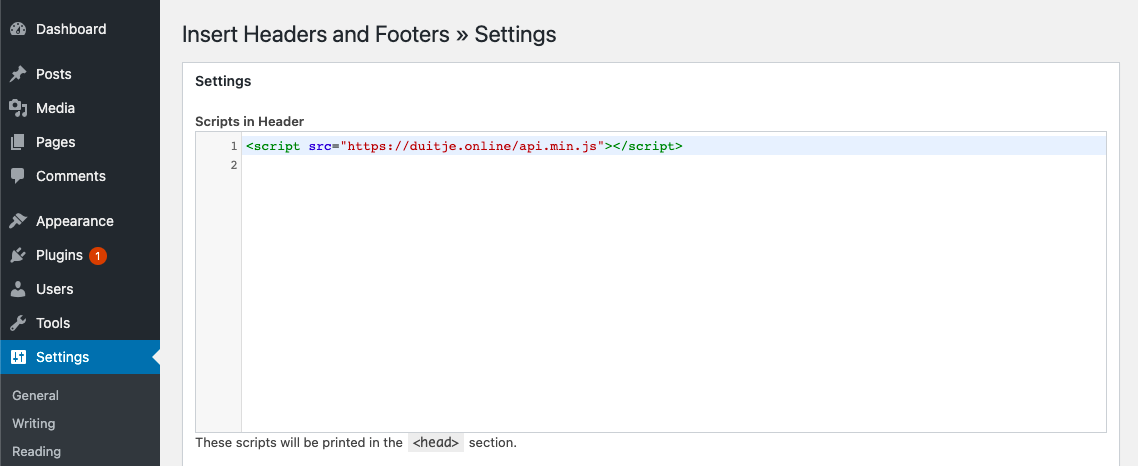
Manier 1: Gebruik de Insert Headers and Footers-plugin
Een betrouwbare en gebruiksvriendelijke plugin is Insert Headers and Footers van WPBeginner. Deze kun je installeren door in je Wordpress-panel naar Plugins Add New te gaan en op "Insert Headers and Footers" te zoeken. Wanneer je de plugin hebt geïnstalleerd, ga je in je Wordpress-panel naar Settings Insert Headers and Footers. Plak Code 1 in het veld "Scripts in Header" en klik op [ Save ].
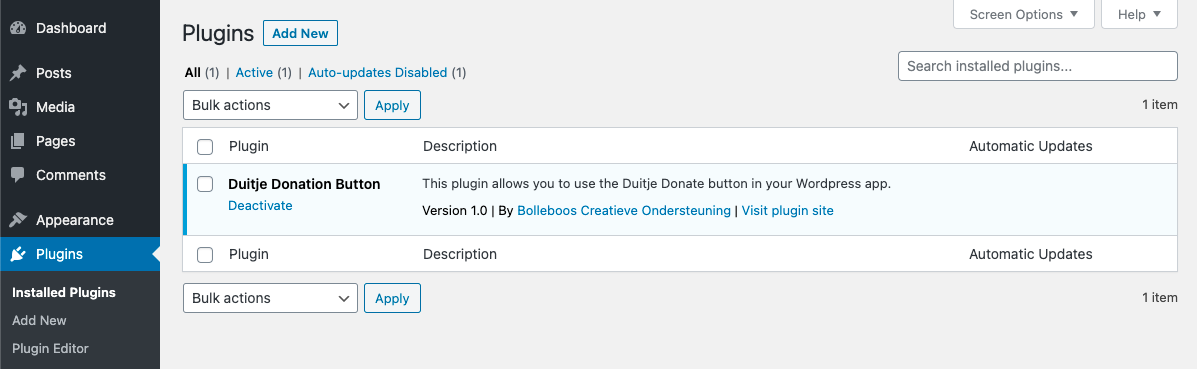
Manier 2: Gebruik onze custom plugin
Je kunt ook onze plugin gebruiken. Deze plaatst Code 1 zelf op de juiste plek. Download de plugin hier als .zip-bestand. Upload dit .zip-bestand vervolgens in je Wordpress-panel door naar Plugins Add New Upload te gaan. Schakel daarna de plugin genaamd "Duitje Donation Button" in.
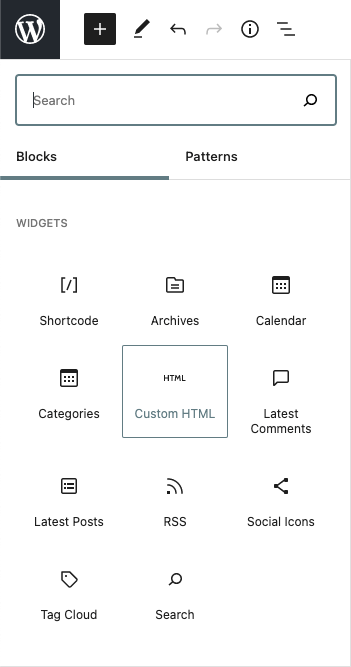
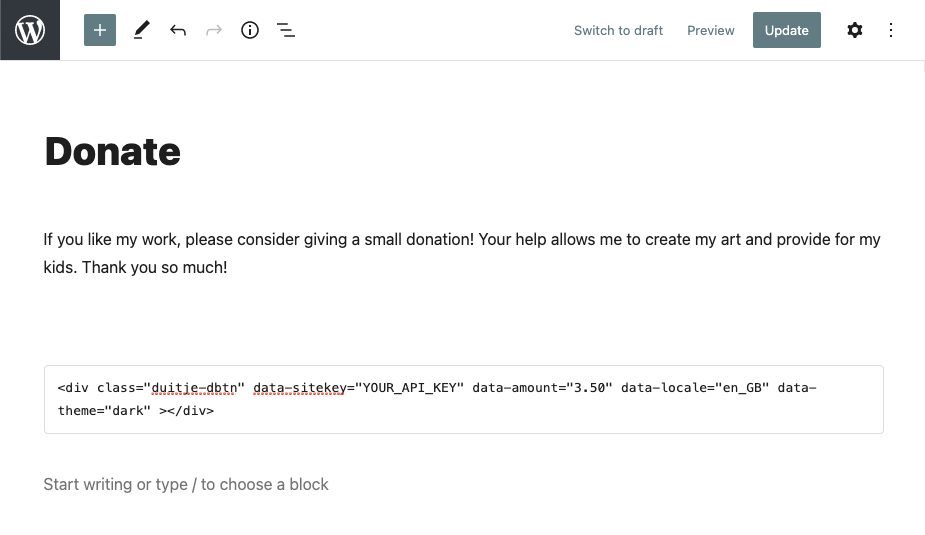
3. Voeg de knop toe aan je website
Je bent er bijna! In deze laatste stap voeg je Code 2 toe aan de body-tag van je pagina.
Navigeer in je Wordpress-panel naar Pages en selecteer de pagina waar je de button wilt tonen. Klik in de header op de [ ]-knop, navigeer naar naar Blocks Widgets en selecteer [ Custom HTML ]. Er wordt nu een HTML-blok op je pagina geplaatst. Plak Code 2 in dit blok. Verplaats het blok naar de plek waar je je button wilt tonen, klik op [ Update ], en je bent klaar!
Conclusie
In deze tutorial heb je geleerd hoe je stapsgewijs de Donatieknop op je website kunt plaatsen. Nu ben je klaar om direct vanaf jouw eigen site duitjes te ontvangen van je fans, supporters, familie en vrienden.
Kom je er niet uit? Wij helpen je graag! Neem gerust contact op, dan kijken we hoe we je kunnen helpen.
Bedankt voor het lezen!
Kom je er niet uit? Wij helpen je graag! Neem gerust contact op, dan kijken we hoe we je kunnen helpen.
Bedankt voor het lezen!